|
User Guide for Mobile version |
  
|
|
User Guide for Mobile version |
|
Login
Simply open your Web Client address (URL) using a web browser, you will see the login page shown below:
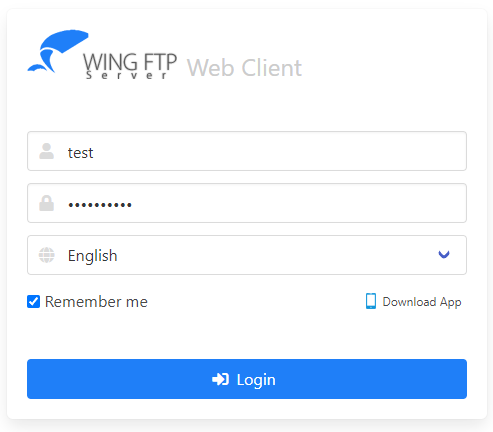
And then enter your username/password and click "Login" button, if username and password is matched, you will see Web Client's main interface like below.
Main Interface
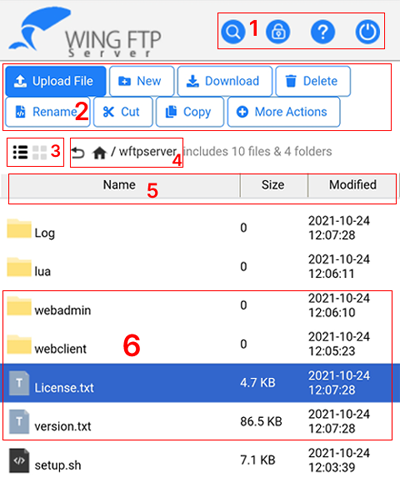
In the above screenshot, we divide the main interface into 6 clickable sections:
| • | Section 1: |
There are a few buttons in this section, ![]() is for opening the window "Search files" to search files,
is for opening the window "Search files" to search files, ![]() is for changing user password,
is for changing user password, ![]() is for opening the help document of Web Client, and you can click the button
is for opening the help document of Web Client, and you can click the button ![]() to log out.
to log out.
| • | Section 2: |
This section contains several buttons to perform various utility functions:
| 1. | Upload File: To upload files simply click this button and then select files to start uploading. |
| 2. | New: For creating a new folder or creating a new text file. |
| 3. | Rename: Select a file by clicking its filename first, and then click on this button. |
| 4. | Delete: Choose the target file first (by clicking the filename), and then click on this button to delete file/folder. |
| 5. | Cut/Copy: Choose the target file/folder and click this button, then jump to another folder and click on button "Paste". |
| 6. | Download: Click this button to download a selected file, you can also double-click on a file to download it. |
| 7. | More Actions: Other useful operations are contained in the "More Actions" menu . |
| • | Section 3: |
Switch the view mode between listing mode and thumbnail mode.
| • | Section 4: |
The button ![]() means "Go up to the parent directory",
means "Go up to the parent directory", ![]() means "Go up to the root directory".
means "Go up to the root directory".
| • | Section 5: |
You can sort the file listing by clicking column headers "Name", "Size" and "Modified".
| • | Section 6: |
You can select a file by clicking on its filename first, and then click the operation button on the top.